
Este é o Dia 13 da série de artigos “20 dias com App Center”. Neste artigo irei demonstrar como adicionar o plugin do App Center em uma aplicação React Native.
Se você está chegando agora e ainda não leu os artigos anteriores da série “20 dias com App Center”, recomendo começar lendo o “Dia 01 – Criando uma conta“.
Adicione o SDK ao projeto
No terminal de comandos, navegue até a pasta raiz do projeto e execute o comando a seguir, para instalar o App Center, App Center Analytics e App Center Crashes.
This file contains bidirectional Unicode text that may be interpreted or compiled differently than what appears below. To review, open the file in an editor that reveals hidden Unicode characters.
Learn more about bidirectional Unicode characters
| npm install appcenter appcenter-analytics appcenter-crashes –save-exact |
Android
Dentro da pasta Android, crie um arquivo com o seguinte nome: appcenter-config.json e adicione a propriedade app_secret. O valor referente a propriedade, é possível obter acessando a página Overview do seu projeto no App Center.
This file contains bidirectional Unicode text that may be interpreted or compiled differently than what appears below. To review, open the file in an editor that reveals hidden Unicode characters.
Learn more about bidirectional Unicode characters
| { | |
| "app_secret": "d1cc8793-cbfb-4eae-b64a-c48960781c97" | |
| } |
strings.xml
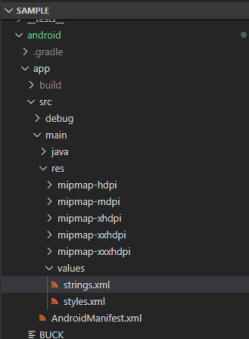
Adicione ao arquivo strings.xml as linhas referentes ao App Center Crashes e App Center Analytics, como demonstrado no exemplo a seguir:
This file contains bidirectional Unicode text that may be interpreted or compiled differently than what appears below. To review, open the file in an editor that reveals hidden Unicode characters.
Learn more about bidirectional Unicode characters
| <resources> | |
| <string name="app_name">Sample</string> | |
| <string name="appCenterCrashes_whenToSendCrashes" moduleConfig="true" translatable="false">DO_NOT_ASK_JAVASCRIPT</string> | |
| <string name="appCenterAnalytics_whenToEnableAnalytics" moduleConfig="true" translatable="false">ALWAYS_SEND</string> | |
| </resources> |
iOS
Para integrar o App Center ao projeto iOS do React Native, é pré requisito ter instalado o CocoaPods. Execute o comando a seguir dentro da pasta do projeto iOS.
This file contains bidirectional Unicode text that may be interpreted or compiled differently than what appears below. To review, open the file in an editor that reveals hidden Unicode characters.
Learn more about bidirectional Unicode characters
| pod install –repo-update |
Dentro da pasta iOS crie um arquivo com o seguinte nome: AppCenter-Config.plist e adicione o AppSecret, como demonstrado a seguir:
This file contains bidirectional Unicode text that may be interpreted or compiled differently than what appears below. To review, open the file in an editor that reveals hidden Unicode characters.
Learn more about bidirectional Unicode characters
| <?xml version="1.0" encoding="UTF-8"?> | |
| <!DOCTYPE plist PUBLIC "-//Apple//DTD PLIST 1.0//EN" "https://www.apple.com/DTDs/PropertyList-1.0.dtd"> | |
| <plist version="1.0"> | |
| <dict> | |
| <key>AppSecret</key> | |
| <string>0f00eef5-4c10-41c6-bb94-240fa3f86194</string> | |
| </dict> | |
| </plist> |
AppDelegate.m
Edite o arquivo AppDelegate.m e adicione os seguintes importes:
This file contains bidirectional Unicode text that may be interpreted or compiled differently than what appears below. To review, open the file in an editor that reveals hidden Unicode characters.
Learn more about bidirectional Unicode characters
| #import <AppCenterReactNative.h> | |
| #import <AppCenterReactNativeAnalytics.h> | |
| #import <AppCenterReactNativeCrashes.h> |
Ainda no arquivo AppDelegate, dentro de didFinishLaunchingWithOptions adicione as seguintes linhas:
This file contains bidirectional Unicode text that may be interpreted or compiled differently than what appears below. To review, open the file in an editor that reveals hidden Unicode characters.
Learn more about bidirectional Unicode characters
| [AppCenterReactNative register]; | |
| [AppCenterReactNativeAnalytics registerWithInitiallyEnabled:true]; | |
| [AppCenterReactNativeCrashes registerWithAutomaticProcessing]; |
Finalização
Após a realização desses passos, basta realizar o commit dessas modificações e gerar um novo build do seu projeto.
Acompanhe todos os artigos da série em: julianocustodio.com/category/appcenter
